Saturday 31 May 2014

Energy Bars - These Boots were Made for Walking

I have taken up walking, seriously - I mean, I don't play sport and I'm not a bike rider and I really don't like hanging out at the gym, except for Yoga and Pilates, so this is the ideal recreational activity for me.

As a plant - aholic, it gives me time to check out every new bud, flower, leaf, petal, grass, nut and seed pod that I don't know (as my family will attest to!) as well as enjoying the landscape and taking time to use my camera.

I am building up my leg strength to tackle bigger walks but 5 - 10 kms at the moment is enough to let me know that I am really enjoying this exercise. Besides, take a small flask of coffee or tea, one of my 'Hiking Energy Bars' and you can imagine walking in the steps of Hannibal!

A while ago, I was given a list of ingredients to make a batch of something called  'Cocaine Bars'.  I made them up using very scant measurements but they were too sweet for my palate. So I have taken some of these ingredients and swapped them for something a bit healthier, nuttier and chewier and come up with this recipe. Still a tiny bit sweet, but that's the reward for getting your butt out on the track!


It makes about 16 bars. Once cold, I cover them in baking paper, put them in a sealed container and freeze them. Before I head out for a walk, I slip one into my back pack for a mid hike snack and that keeps me going.


Hiking Energy Bars

Ingredients

You can use a mixture of the following dried fruit - my combination was the following but you can mix this depending on what you have in the pantry.


50g dried cranberries
20g prunes, pitted
50g sultanas
100g dates, pitted
pumpkin seeds, sunflower seeds, pine nuts - I found a bag of mixed and used 100g total
50g flaked almonds
20g macadamia nuts
2 tbls malt extract (not essential)
2 tbls honey
150 g apricot jam - or use your favourite jam
100g soft brown sugar
50g whole almonds
100g rolled oats
3 tbls cinnamon
2 tbls cocoa powder
1 tsp ground nutmeg
100g shredded coconut
220g unsalted butter.

1. Heat oven to 170 degrees fan forced.
2. Combine dried ingredients in a big bowl and then add them to  food processor and process until they are well combined. Don't over blitz them because you want some texture.
3. Melt butter in a pan, add honey, jam, cinnamon and nutmeg.
4. Add butter and spices to the mixed dried ingredients and mix thoroughly.
5. Grease and line a large baking tin with baking paper and tip in all the mixture. Lightly press down to level the top and bake in the oven for 20 -25 minutes until brown. Be careful not to over cook.
6. Cool in tin then cut into individual sizes that you prefer. Wrap in baking paper and place in a sealed container in the freezer.


Sunday 25 May 2014

Lemon Curd

As promised, here is my recipe for Lemon Curd. This is very easy to make and is truly delicious. It makes around 500 grams which is about one and a half jars. It made enough to make 6 individual cheesecakes (see recipe under Fast Lemon Cheesecake).


Lemon Curd
Ingredients

2 whole eggs and 2 egg yolks
3/4 cup of caster sugar
80 grams unsalted butter
zest and juice of two lemons

This is all you need
Keep whisking until it thickens
  • In a medium saucepan whisk 2 whole eggs and 2 egg yolks with caster sugar until light and smooth.
  • Add butter,lemon juice and zest, and heat over a low flame beating continuously until it thickens. This will take between 5 - 8 minutes. 
  • strain the curd through a sieve and then bottle in a clean sterilised jar. 
  • Cover and refrigerate. This will keep for a couple of weeks in the fridge -  if you have will power.
I use the curd to fill sweet pastry cases too. yum!


Wednesday 21 May 2014

Fast Lemon Cheesecake

I think lemons are the most amazingly versatile fruit. Do you agree? Can you think of another fruit that you can use in so many different ways?

This is the first time for many years that I do not have my own lemon tree and I get quite cross when I see how much one lemon costs in the shops, when you are sure that there are lemon trees in the neighbourhood that have unwanted fruit. (I just have to find them) I probably used 4 or 5 lemons a week, either for their zest or juice, so if I can find a local supply, I would be happy to swap something from my garden for a few extra lemons.
Lemon Festival at Monterosso al Mare, Italy
The annual Lemon Festival in Italy, usually in May is quite small and is very localised. All the shops and businesses in town decorate their places with lemons and sprays of lemon flowers and anything yellow they can get their hands on. It is very nice to visit at this time because everyone is happy, the weather is excellent and the streets are adorned in yellow and the smell of the lemon blossoms is superb.

In France there is an annual Lemon Festival, Fête du Citron, in a town called Menton in the Alpes-Maritimes. They have been growing citrus since 15th century and the festival now attracts visitors from around the world. It's on my bucket list!

A couple of days ago I needed a quick dessert which my guests would love so I decided to make this Lemon Cheesecake. It is quite straight forward. Basically you can buy everything and just assemble it and everyone who has tasted it loves it. However, if you want to make it that bit special, make your own Lemon Curd.

(I will post the recipe for the Lemon Curd later in the week)

I have great childhood memories of thick slices of bread and butter with a topping of sticky, yellow, sweet lemon curd. It was a real treat then, now it's a reminder of my family back in the UK and how it used to be. So, before I shed a nostalgic tear, let's get back to the recipe.


Fast Lemon Cheesecake

You will need 4 glass tumblers or something similar for this recipe.


Ingredients - Makes 4

1 Tub of Mascarpone Cheese
1 tblsp caster sugar
Jar of lemon curd either bought or home made
10 ginger biscuits or digestive biscuits
100g unsalted butter
50 grams of blanched almonds or macadamias
1 tsp vanilla essence
Punnet of raspberries or strawberries fresh or frozen
Chocolate to make shavings 

1. Smash up the biscuits and the nuts together either using a rolling pin or a mortar and pestle. Don't make them too fine because you want to retain some texture.
2. Melt butter in small saucepan and add the nuts, vanilla essence and biscuit crumbs. Mix well and divide this between your glasses. This is the base of your cheese cake.
3. Sprinkle raspberries or chopped strawberries on to the biscuit crumbs.
4. Add 4 tablespoons of thick, delicious Lemon Curd.
5. In a small bowl mix caster sugar, Mascarpone and place a good swirl on top of the curd.  Level it so it looks nice and neat.
6. Grate Chocolate and sprinkle over the Mascarpone, or make some shards of     chocolate.
7. Keep in the fridge until you are ready to serve. You don't need to serve anything else with because it is rich and sweet enough.

If your guests don't say that they would like some more I would be very surprised!


Here's one I prepared earlier


Monday 12 May 2014

Pumpkin Pizza

Winter is upon us and I suddenly have a longing for soup, heart warming vegetable stews and casseroles, parsley dumplings and curries. Time to head for my recipe files and sort them out, something I have been meaning to do for a very long time.

Time seems short now because I am trying my hardest to put on my hiking boots every day and head out into the bush for a walk. (Bush = countryside). Living so close to a National Park is wonderful because the walks are varied, it has a natural beauty and if you are lucky you get to see some wild life, koalas, emus, birds and the odd kangaroo. I am building up my muscles to be able to go on extended hikes, aiming by the end of winter to handle more than 20 kms at a time.
For any hardened bush walker this may seem a bit pathetic, but it is the best I can do right now!

So I had an idea that if I made some pizza dough, left it to rise while I went walking I could have a big chunk of pizza for lunch! What's more, I will feel that I have earned it! What a way to celebrate Mother's Day!


It was very foggy in the National Park


I love pizza! I like it simple, bocconcini, home made tomato sauce, a handful of freshly picked basil, cheese and a scattering of olives. In Italy, pizza is very simple; tomato, cheese, fresh basil and a beautiful crusty dough - heavenly! Large slices are sold like fast food, take-away!

But I also like this Pizza! It has lots of flavour, easy to make and adds a little something else which I am sure you will enjoy!


Pumpkin Pizza

Here is the most amazing pizza dough recipe. It is so easy I can now make it blindfolded. The dough will make the equivalent of two pizza bases, unless you like a really thick dough. I usually put half in the freezer for later use, or make 2! This is a standard - no fail - Pizza Dough recipe and you can use it as a base with any pizza topping!

Dough Ingredients
3 tbls Olive Oil
2 cups of Plain Flour
1 tsp caster sugar
1 tsp Salt
3/4 cup of warm water
8g Dried Yeast

Dough


Put all the dried ingredients into a large bowl and mix together. Add the oil to the water and mix into the flour. Keep mixing with your hands until it all comes together to make a dough. Keep working it in the bowl, don't add more water. Knead for about 5 - 8 minutes on a floured board. Place the dough in a clean bowl, cover tightly with plastic wrap and place in a warm spot until it has doubled in size. I usually leave this on a window sill for an hour, but you will have to gauge this depending on where you place it.


When it has doubled in size, punch out the air on a floured board break into 2 pieces. Roll out one on a floured board to the size and thickness you like and it is ready for your topping. I have used all of the dough for one big pizza but easier to handle if you make two!

I cook mine either on a bread stone or a normal pizza pan, which ever you have available. Remember that the bread stone needs to be heated gradually to avoid cracking. Put it into the cold oven when you turn your oven on and bring the temperature to 210C, fan forced.


Pizza Topping

Pizza Ingredients

1/2 butternut or Jap pumpkin, seeds and skin remove and cut into  thin slices

100g  mild blue cheese
4 tbls maple syrup
1 tsp cumin seeds
1/2 tsp chilli flakes
Handful of rocket or baby Spinach
1 tbls Olive Oil
1 tbls balsamic vinegar
120g Pecorino/Mozarella Cheese
Fresh basil

Oven temp,  fan forced at 180C degrees. Add olive oil, cumin, chilli flakes into a roasting pan and add the pumpkin and coat with spices and oil. Add maple syrup over the top. Cook in the oven for 15 -20 minutes until soft. Take out pumpkin and reserve any liquid. (You can use left over pumpkin in a salad, it is good hot or cold).
Add pecorino/mozzarella to pizza base, lay pumpkin on top, add small chunks of the blue cheese, and basil. Mix tablespoon of balsamic vinegar with a little olive oil and add this to the pumpkin juices and sprinkle over the top of the pizza. 
Turn the oven up to 210C degrees and cook for around 10 minutes until the cheese has melted and the dough is browned. Serve hot with a few rocket leaves and fresh basil. The blue cheese in the pizza is not very strong but you can substitute for any other cheese you prefer.


Wednesday 7 May 2014

Organic Markets - Love them or Lose them!

It is rewarding to grow your own fruit and vegetables. Because it is so nice to have produce you can pick exactly when you want it and you know what you have put on the plants to make them grow. We have a saying in our house when we pick anything from the garden " it could only be fresher if I had run from the garden to the house". For many people growing your own isn't an option, due to climate, availability of land etc, but where you buy your produce from, is an option.

If you are like me, the thought of buying all my vegetables from one of the major supermarkets is really not acceptable. Basically, I like to support local growers and I believe if I buy from a Farmer's Market or local market I am helping to keep the smaller growers in business. 

Thank goodness for dedicated, passionate people like Aasha, who runs The Organic Corner Store. Open at Glenelg North Community Centre, Alison Road, Glenelg North on a Thursday 9.00am - 1.00pm and  at the Bellevue Heights Primary School on Saturdays from 9.00am - 1.00pm. 


Look for this sign!
Aasha, has been running this Organic Market with the help of a few volunteers, for almost 2 years and when I visited the Glenelg North site last week, I was met with a fantastic array of fresh, in season, organic vegetables and a frenzy of people enjoying the weather and the atmosphere of the market. 
As part of the Organic Corner Store there is a fruit and veg co-op where you can pre-order a box of organic goodies. Aasha has searched the markets to ensure that what you get in your organic box lives up to its name - 'organic', at a comparable price. For $25 plus an admin fee of $5 you get a mixture of vegetables and fruit in season. And you can order as many as you like. You can email an order through and then pick up on Thursday or Saturday. Now what could be easier than that?

Check out the photos and see how this produce compares to what you are currently buying.


The fruit and vegetable orders waiting to be collected

A box of organic fruit and vegetables, ready to be taken home

What an enormous head of broccoli

There were many other delicious things to try and buy; Wine from Wild Fox Wines, Organic flour and rice and other pantry goods from Seed Independent Organic Co, Olive Oil from Armata Grove . The market at Bellevue Heights is relatively new and it would be great to see this take off like the Glenelg North market.

Beautiful local Olive Oil from the foothills of Adelaide

I bought the organic brown rice and I have to say that it is the best I have ever tasted


There is also a Food Swap table where you can bring in your extra fruit, herbs, veg or home made produce and swap for something else, maybe a jar of pickle or even some plants.
The swap table was doing a good trade for most of the morning
My biggest concern is that there are not enough locals supporting the venture in Bellevue Heights and if we don't give it our support then the major supermarkets win out again. The venue is ideal if you have children because they can use the playground while you sit in the sun and enjoy a coffee from the Great Relish Nomadic café. 

Believe me when I tell you that when I checked out the 'Organic' produce at the supermarkets, I would have thrown most of it in my compost bin! And the price.......well lets not get into a discussion about that.

If you are living close to Adelaide, in the local area or would like a great excursion, then wander in to one of these venues and say g'day! Because if we do not support these ventures, where to buy wholesome, organic food will be very limited if not impossible, especially on your doorstep.

Thank you Aasha and your volunteers for what you are doing to promote good, healthy, chemical free food.


Thursday 1 May 2014

Lunch in Provence

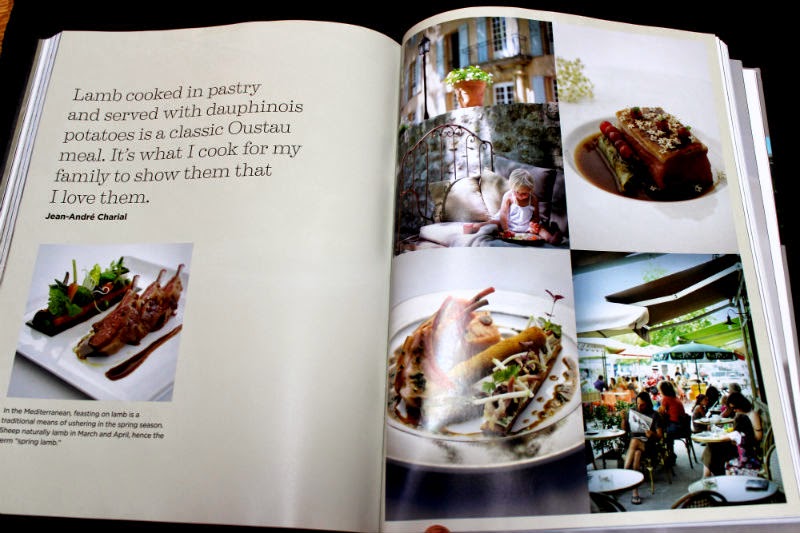
I thought I had died and gone to heaven when I first saw this book. 'Lunch in Provence' by Rachael McKenna and Jean-Andre Charital,  PQ Blackwell Ltd 2012.
This is not just another cook book. It combines art, poetry, travel, customs and recipes. All of the photographs, recipes and narrative are superb and they will transport you from wherever you are to Provence in an instant. Ratatouille Nicoise, Asparagus with slow-cooked eggs, mushrooms and truffles, Hazelnut Clafoutis with Cherries and Raspberries are but a few of the dishes that excite me and I wish I could share them with you. I hope you get a chance to see this book, you will not be disappointed.


This is definitely whetting my appetite for French travels next year.

My sortie to France this year will consist of only 2 days in Lille en route to Ypres to visit the War Memorials but I am hoping there will be time to check in at a couple of cafes and patisseries, hug a bottle of wine and drink a few cups of French coffee. Am I making you all green with envy? I promise to bring back a selection of interesting recipes from my travels.

If you have a favourite place to eat in Lille, especially vegetarian, please let me know because we wont have a lot of time for leg-work and I really want to have the best experience I can.

I hate to leave you feeling deflated so I am sharing my recipe for a French Onion Tart. This pastry just melts in your mouth and the filling is smooth and creamy and so very French. Enjoy!


Tarte à l'oignon

Ingredients - Oven temperature 180 degrees fan forced

For the pastry

200g plain flour
110g butter
Pinch salt
2 tbls cold water
Extra butter for greasing the flan dish

For the filling

300g of thinly sliced brown onions
100g butter
200g carton Crème Fraîche
3 eggs
pinch salt & few grinds of black pepper
4 sprigs of thyme

To make pastry
  • Sift flour into a bowl, add chopped butter and pinch salt and rub the butter into the flour so it resembles breadcrumbs.
  • Make a well in the centre and add water, just enough so it comes together to form a soft dough.
  • Wrap this in cling wrap or put in a plastic container and rest in the fridge for 15 minutes.
  • Butter the bottom and sides of a fluted flan dish
  • Roll out the pastry, leave to rest for 10 minutes, then place this into the flan dish, pressing the pastry into the flutes.
  • Now add some baking paper to cover the base of the pastry, add baking beads and blind bake in a preheated oven for 15 minutes or until the pastry is lightly golden brown.
  • Take out the flan, remove the paper and the baking beads.
  • The pastry is now ready for the filling.
Filling
  • Melt butter in a large frypan and then add the thinly sliced onions. I use a mandolin to slice them finely.
  • Mix the onions into the butter, turn down to a low heat, cover and cook for about 30 minutes until they are soft and a pale golden colour. Keep checking them to make sure they don't burn or get too coloured.
  • Once cooked, cool in a large bowl.
  • When ready to fill the tart case, place the onions on the base of the tart shell. 
  • Beat the eggs lightly, add the Crème Fraîche, sprigs of thyme, salt and pepper and pour this onto the onions. Add a few more thyme leaves and place in the middle of a pre heated oven for 30 minutes or until the tart is set and the pastry is golden coloured.